Saturday, July 29, 2006

Studio stuff and a quilt show

We finished the floor Thursday night, before dinner even! It looks great, especially now that all the bits of paper backing are picked up and the floor is cleared of tools and such. I love it! As for the baseboards, I looked all around the garage and couldn't find the sander ... aw, darn .... But the great thing is, when my husband stopped by the store after work Friday to buy a new piece of baseboard to match the old (to go by the closet area), he found some nice baseboards that were already primed and ready for paint, so he bought 2 16' lengths and a pint of bright white paint instead ... when I drove into the garage Friday afternoon and saw them straddled across the garbage cans, I actually squealed LOL! It was too hot to paint them last night, so I got up early today and have already given them 2 coats. They look so nice ... I'm so happy! Now I just have to wait for my husband to get home from work so we can install them. My goal is to have them in by Wednesday in time for my stepmom's afternoon visit. We'll have so much fun organizing all my "stuff"!

Since I can't do anything else with the baseboards until he gets home, my goal for today is to fill out quilt show entry forms. My local quilt guild, the Prairie Star Quilters Guild, is having their biannual quilt show at the end of September, and entry forms must be turned in by August 15th. I need to measure all the quilts I plan to enter and try to remember all the details ... I really need to write this stuff down when I'm actually working on them LOL! Here are the quilts I plan to enter so far:


Thursday, July 27, 2006

The floor is almost done!

Monday night, just before bedtime, my husband started laying the tiles ... he only wanted to lay about 5 or 6 so that I could keep going the next day, but he got on a roll and laid about 15 before finally saying he really had to get to sleep LOL! Each day since, he's come home and laid more and now it's almost done ... yay! We've got one area of old parquet tiles that needs to be patched before we can lay the new tiles there and then the rest should be done by tonight or tomorrow (depending on how long it takes for the patch to dry/cure/whatever ... I'm not sure what he's going to do there). Then we can tackle the baseboards. We've decided to go ahead and sand the old baseboards and paint them white. So my job for today is to unearth the sander and get started.

Friday, July 21, 2006

Are we there yet?

This studio redo is taking longer than I hoped ... I know, surprise, surprise ....

The painting is done and the painting stuff is all put away. Now we are tackling the floor and baseboards. I spent all my free time yesterday scouring the parquet tiles with steel wool ... my wrists are so sore! I just need to damp mop it and let it dry and it'll be ready for the tiles. However, my husband has decided that I need to buy better floor tiles than what I settled on before. Something more durable ... the tiles I bought are low end stuff that might not stand up to constant rolling on from my chair and could rip from moving the shelving units. Well, who am I to question getting something better? LOL! So I'm off to Home Depot to see what they have. Hopefully, they'll have something I really like ... and I'd really like it if they were on sale! Don't know how I could beat $66 though ... oh, yeah, I originally spent $80 on the flooring, but then 3 days later we were at Menards again and I saw they were on sale. So I marched right up to the front desk for a price adjustment and saved another $14. I was so happy about that, and now I'll probably end up spending about $200 for something better LOL! Oh, well ....

Update: I'm back! Found something I really like, and the price wasn't too bad either. For about $160, I got these reddish brown tiles. At first I was going to get it in the green colorway, but decided that'd be too much and that these were a little more neutral. And they do have some green splashes blended in that look really pretty. They're darker than I originally thought I wanted, but I think they're going to look really nice in the room ... and they'll hide scuff marks and dirt better than the other ones would've done, so that's definitely a plus LOL! Only problem ... I have to let them sit in the room for 48 hours before installation. It's always something, isn't it?

Monday, July 17, 2006

Ceiling and walls and flooring, oh my!

Well, it's Monday and the studio isn't quite as far as I'd hoped. But it's close! Got the second coat on the ceiling on Friday. On Saturday Warren finished the patch of the crack on the east wall and gave the north and west walls 2 coats of the green. Yesterday I primed the east wall and the closet wall. Then while I was putting the girls to bed last night, Warren painted the first coat of green on those walls. I still need to sand the spackle on the inside edge of the closet opening so that it can be painted, too and then these 2 walls can get their second coat. Warren also changed out the outlets to new white ones, and they look so pretty against the green (never thought I'd get so excited about outlets LOL!)

But the floor and baseboards, oh my! The flooring is wood parquet tiles, which wouldn't be too bad except the previous owner who installed them didn't take good care of them. I think they let their kids paint the walls because there is paint splattered all over the floor and the baseboards, too. Even the outlets had paint all over them ... anyone ever hear of using a damp rag while painting?! Sheesh! So anyway, we had to decide whether it was worth trying to clean the paint off or to cover it with something else. We decided that if we could find some nice stick-down tiles, we'd go with that. So on Saturday, while Warren painted, I went to Menards and found (after much deliberation) some pretty tiles that have light green vines/leaves in the center. For only about $80, I'll have a new floor ... love it! It's really going to lighten up the space, too, since the current floor is kind of dark. As for the baseboards, Warren is going to see if he can find something tall enough to cover the original boards' marks. If we can't find anything we like or that fits our budget, we'll just paint the old ones white and put them back up. But I'm really hoping we find something else ... the old ones are sooo boring!

Since we still need to finish painting and now have to tackle the floor, looks like it's not quite ready for my stepmom's visit this afternoon. Oh, well ... the pantry really does need some straightening ....

Wednesday, July 12, 2006

My studio

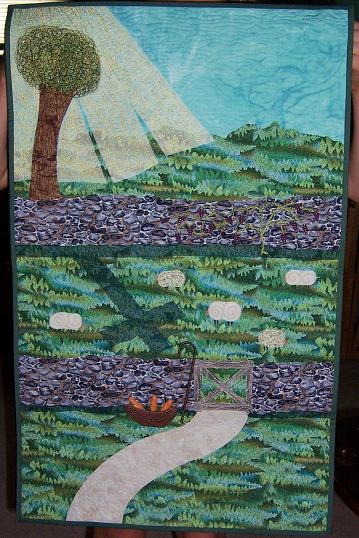
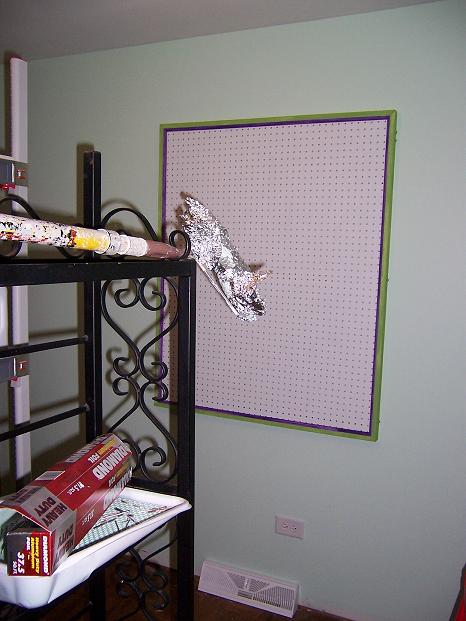
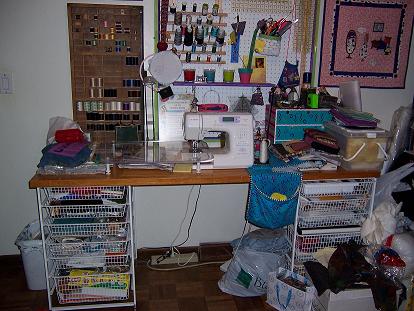
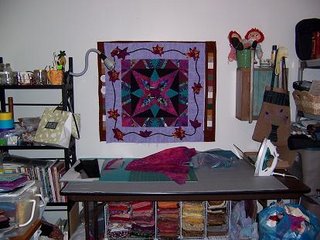
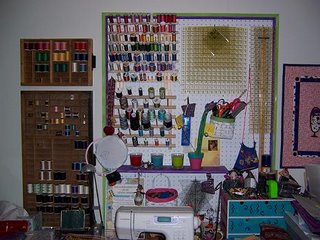
I'm getting antsy ... I haven't been able to work on any projects in the past week or so. But that's okay because we are finally getting around to redecorating and reorganizing my studio ... yay! My husband called me one day last week and said, "If you start emptying the room, I'll start working on it." Hey, when that happens, I get moving LOL! My studio is one end of a long, narrow room that's roughly 28' x 10', with part of my side of the room jutting out towards the garage about 3 feet, making a long, skinny L shaped room. My area is roughly 9'x13' and the rest of the room is the girls' playroom (so I guess the whole room is really a playroom LOL!) Here's before pics of the west and north walls. The west wall was my sewing area, complete with pegboard and wire basket units. The north wall was the cutting and pressing area (I used the small wallhanging above the table as a little design wall).


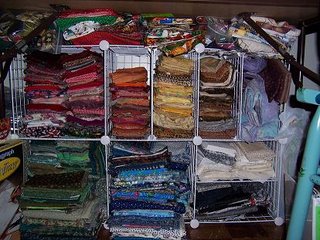
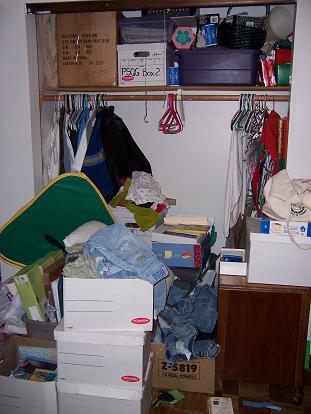
We actually started working on the studio a couple months ago. As you can see from the bottom right picture, all my fabrics were hiding in cubes under the cutting/pressing table ... not the best solution (oh, my aching back!). But a couple months ago, my husband revamped the closet that's on the south wall. It went from a boring old one-shelf and hanging rod clothes closet to a multi-shelf artist's dream closet with just a few days' worth of effort. He installed 
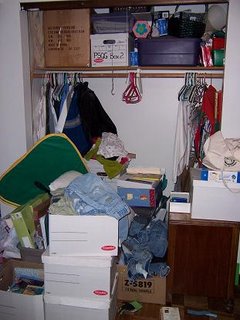
rope lights around the sides and top of the opening, and even installed a motion sensor so that all I have to do is reach in and they turn on. Love it!! What's more, he installed more of the rope lights along the edge of the 2 shelves that hold my fabric so I can see it better ... that was such a great idea ... thanks, honey! Here's what the closet used to look like (I'll have to show you the after pic later ... right now it's crammed full of stuff that will eventually end up on the shelving units or back on the pegboard ... and, besides, it's currently covered with a tarp to keep dust and paint off the contents):

After the closet got done, the rest of the room got put on hold again ... that is, until that wonderful call last week LOL! Since then, I've pulled everything out that I could move (it's all in a relatively tidy pile in front of the fireplace ... thank goodness it's summer) and moved the tables and shelving units to the middle of the room. The only thing we didn't touch is the pegboard ... that's bolted to the wall so it ain't budging! So far we've washed the walls, spackled the holes, mudded a huge crack in one wall, primed the remaining 3 walls and primed and painted the ceiling. Next we need to finish the cracked wall and get it primed so that we can paint. Last year we painted the girls' playroom area a soft green, so we'll paint my side the same, of course. Can't wait! I'm hoping that we can keep up the pace we've set so far and can have the room completely painted by the weekend. My stepmom is coming over Monday afternoon and since she's an organization consultant, it'd be the perfect time to start moving the stuff back into place ... she'll keep me from adding stuff I don't need in there LOL! But if it's not ready for that, I'm sure we'll find something to organize (that pantry is looking mighty messy ....)

I've planned a totally new layout, including space for a proper design wall ... can't wait for that, for sure ... before, things were pinned on top of each other on the little wallhanging about 6 layers deep! Besides the new design wall, the only thing I will need to add is a new sewing table. The old table was simply an old door laid on top of the wire basket units. It worked okay, but I didn't like that it was so narrow ... left hardly any room behind the sewing machine when I was trying to quilt anything bigger than a fabric postcard! I plan to use the wire units to hold up one end of the new table, and for the other end and back of the table, I will use two low shelf units that I bought a year ago just for this purpose ... found them on clearance for $13 each ... love it! I can't wait to see what my husband comes up with for the tabletop ... I just know it's going to be wonderful! Of course, all this is subject to change ... a woman's prerogative and all that LOL!

Hope I've got lots of new pics to share in a few days!

Monday, July 03, 2006

One more decorative journal


Well, Abby is happy now. Got her journal done and it's just like big sister Emily's ... it took me less than 20 minutes to put it together, not counting time for the glue to dry. Gotta love that instant gratification! Now that it's done, I really should go do some housework ... it never ends LOL! Hmmm ... maybe I need a decorative journal to hold my chore lists ....

Sunday, July 02, 2006

Decorative Journals


I bought a book a few days ago called Decorative Journals by Donna Downey. I love this book! It provides instructions for making 25 journals, some from scratch and some personalizing an already made item. I just had to make one right away! I chose the prong fastener journal first, a from-scratch project using chipboard (I used a cereal box), decorative paper and cardstock, and, of course, a prong fastener. When I dragged out a box of scrapbooking papers yesterday, my daughter Emily excitedly asked, "Are you making me a book?!" So, of course, I just had to make her one, too LOL! In the book, it's listed as a to-do journal for keeping track of errands, but I decided to call mine a "check it out!" journal. I keep a running list of books and videos that I want to check out at the library in the future. Instead of a few scraps of paper hiding in the bottom of my purse, I now have a nice little journal to jot these titles down in. I even have the perfect little pen to keep with it ... now when I go to the library, remembering which books I wanted to read will be a snap!

Emily chose a fun blue fuzzy paper for her journal. She was so impatient to get it going that she cut a big rectangle of chipboard herself before I could stop to help her LOL! I took the piece and cut it into the 3 pieces needed and then we worked together on making it. Because she cut the rectangle without knowing what size to make it like mine, it ended up being smaller, and now it's the perfect size for her ... fun when things work out like that! Mine is 5"x8" and Emily's is 4 1/2"x5 1/2". Now Abby wants one, too! She wants it to be fuzzy like Emily's, so I dug out a piece in a nice deep shade of purple. I will hopefully get it made tomorrow. I'm sure she'll remind me to work on it!

Not sure which one to try next ... I really want to make the DVD tin journal, but I don't have one handy. I'll have to keep an eye out for one, but in the meantime, I think I may make the simple spiral notebook journal ... it'd be perfect for keeping track of all the cute things my girls do that I'm so sure I'll remember, but then can't remember when I want to share the story with the grandparents LOL!

If any of you have the book (or buy it soon) and make a journal from it, please be sure to share pics ... I'd love to see what others have done with these fun projects! Thanks, Donna, for writing this book ... so fun!!
Blog Widget by LinkWithin